Creating a Contact
A contact is created in the system to capture the master data of a natural person.
Sales Executives capture the master data of a contact in the EditView:
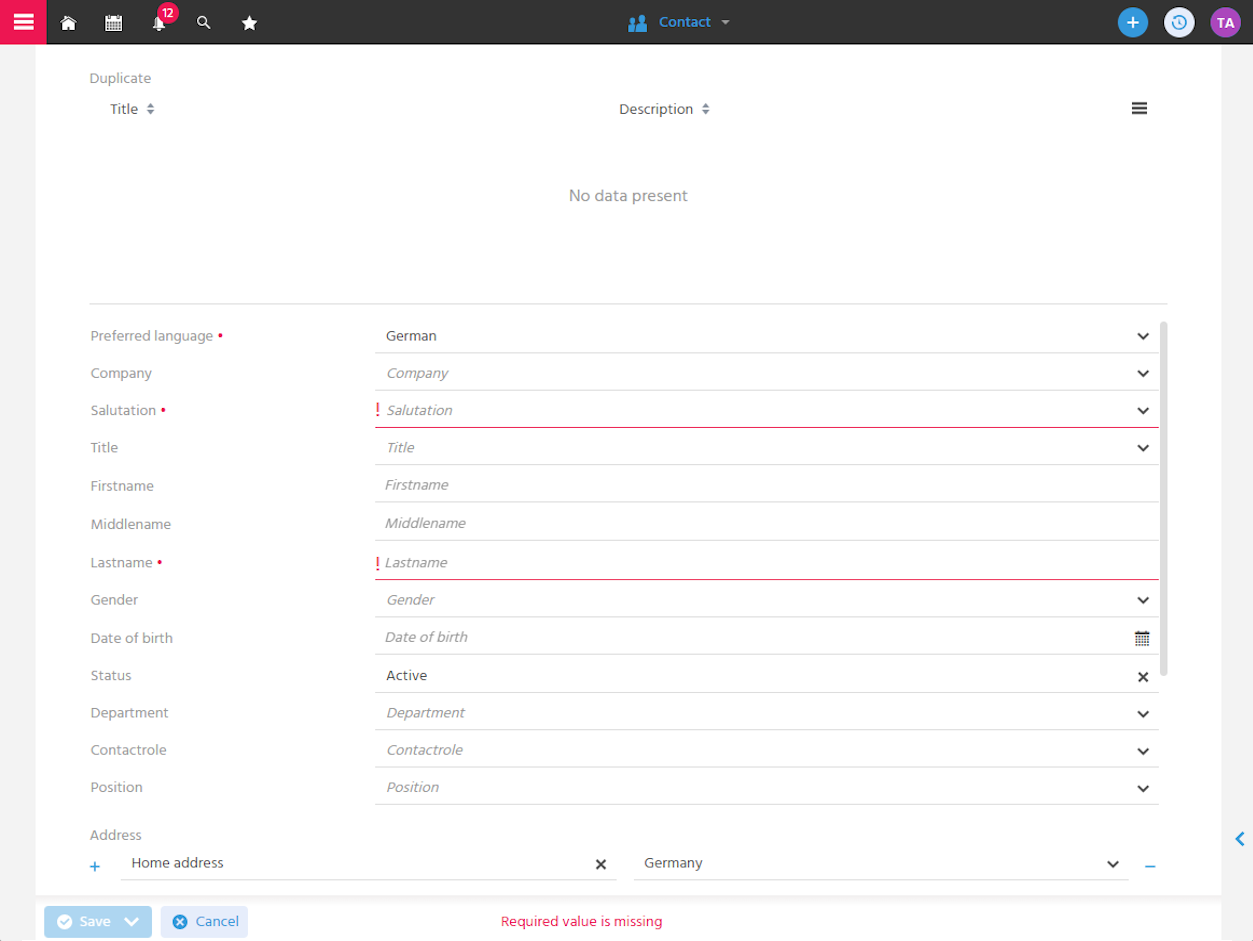
The EditView can be opened via the following entry points:
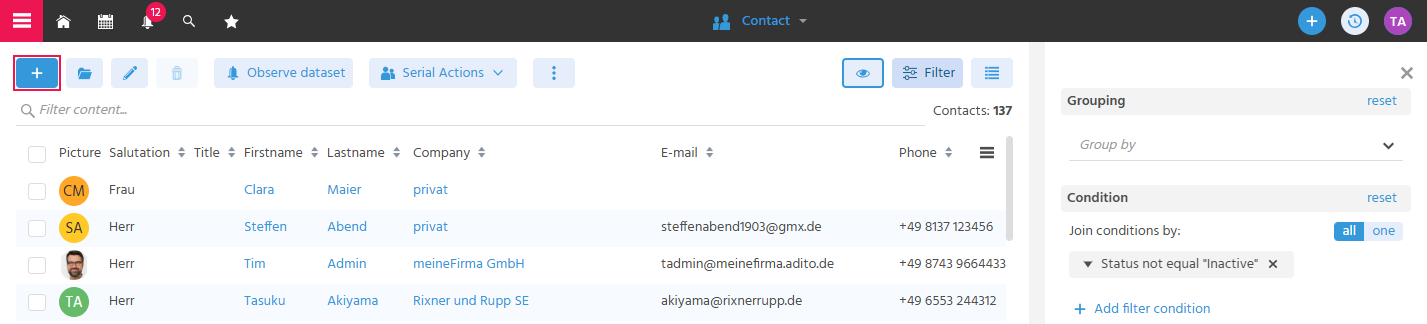
FilterView of the Context "Contact"
The EditView can be opened either via the FilterView of the Context "Contact" or via Quick Entry in the Global Bar.
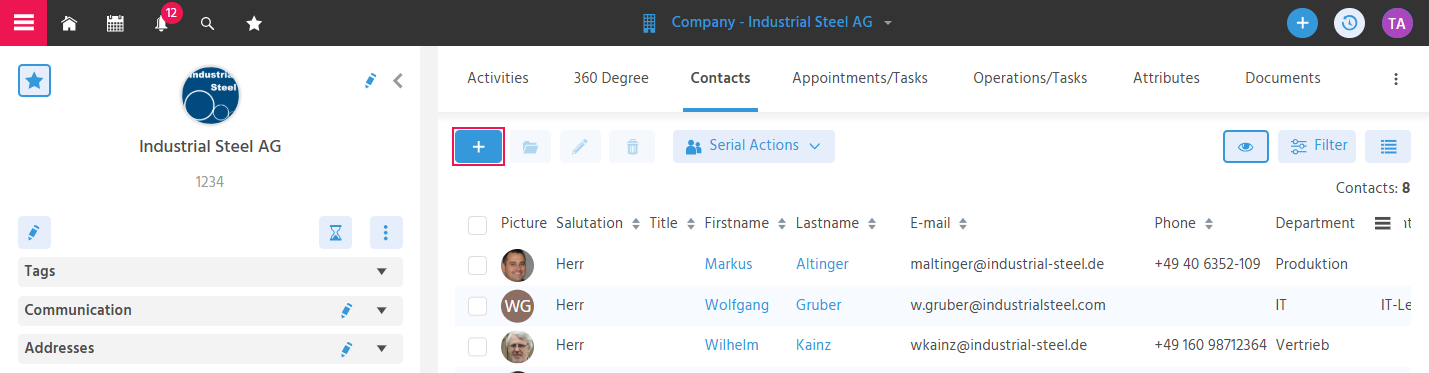
"Contacts" tab in the MainView of a Company
If the contact works at a company that is already recorded in the system, the EditView is opened from the "Contacts" tab in the MainView of the company.
Quick Entry in Quick Entry
Via Quick Entry in Quick Entry, various options are available to capture the contact, the company, and an Activity. See chapter "Supporting Data Entry"
Capturing Personal Data
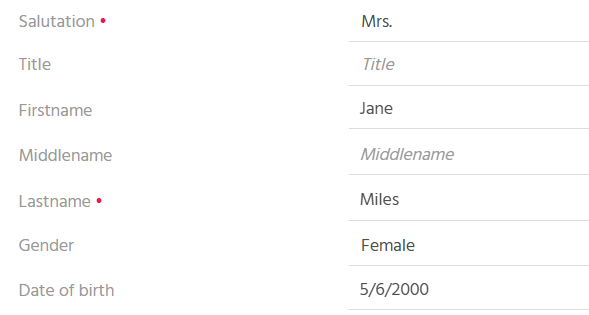
Personal data of contacts with whom a business relationship exists is captured in the system. This allows them to be clearly identified in the system, addressed in a personalized manner, and linked to further information. Personal data includes:
-
First Name
noteIf a contact has multiple first names, all are captured in the "First Name" field. This means:
➡️ All first names can be searched for in the index search.
➡️ All first names are displayed in Salutations and address fields (in letters or E-Mails).🛠️ → By default, up to 50 characters can be captured in the "First Name" field.
-
Middle Name
noteThe "Middle Name" field is not for capturing additional first names, but for capturing a middle name if one exists.
-
Last Name
-
Salutation
noteThe behavior of the "Salutation" field is controlled by the input in the "Gender" field.
➡️ For the gender "female" or "male", the "Salutation" field is a required field.
➡️ For the gender "diverse", the "Salutation" field is not a required field.🛠️ → This behavior applies to the languages "German" and "English".
-
Title
-
Gender
-
Date of Birth
Adding a Company
The company record is captured on the contact record to ensure that the relationship between a contact and a company is correctly mapped and all relevant information is centrally traceable.
The link between the contact and the company is also mapped when capturing the contact data in the "Company" field.
- This field is selected manually when creating a new contact opened, e.g., via Quick Entry or the FilterView.
- This field is filled automatically when the new contact was opened from within a company.
"A new employee of a company introduces themselves and submits their contact details."
This is how they can be captured in the system:
FilterView of the Context "Contact"
If the EditView is opened via the FilterView of the Context "Contact" or Quick Entry in the Global Bar, the value in the "Company" field can be selected manually to establish the link to a company, or to capture a private individual.
"Contacts" tab in the MainView of a Company
If the contact works at a company that is already recorded in the system, the EditView is opened from the "Contacts" tab in the MainView of the company.
➡️ The contact is automatically linked to the company, as the company from which the EditView was opened is transferred to the "Company" field.
➡️ Additionally, input is supported if the company already has a phone number and an E-Mail address recorded. In this case, the phone number and E-Mail address are transferred to the new contact creation view. This means only the personalized data needs to be adjusted, i.e., the extension and the name in the E-Mail address. The area code and the E-Mail address ending do not need to be re-entered completely.
Quick Entry in Quick Entry
See chapter "Supporting Data Entry"
Capturing a Private Individual
Private contacts that cannot be assigned to a company can be created in the system — to clearly identify them, address them in a personalized manner, and link further information to them.
For this, the value "Private" is entered in the "Company" field.
Capturing a Profession
It is documented which professional role and function a contact has within a company. This allows targeted communication to be mapped using information such as department, function, and position.
This information is captured in the following fields:

- Department - Where does the contact work?
- Function - What function do they have there? - Corporate management, division management, department management, team management, or employee
- Position - What is their exact job title? - This is captured as free text, e.g., the designation from the E-Mail signature or business card.
Capturing Address Data
The address data of a contact is captured to ensure correct postal assignment and reliable contact.
At the contact, the private address and, due to the link to a company, the company addresses are displayed in the Preview.
ℹ️ For a private individual, only the private address is displayed on the record if one has been captured.
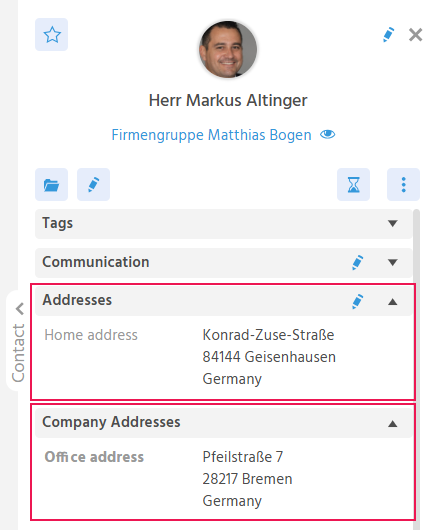
The "Address" area includes the following fields:
- Address type - Various addresses can be captured via the address type. Depending on whether the address is captured at the company or at the contact, different address types are available. For companies, "Company address", "Delivery address", and "P.O. Box" are provided; for contacts, "Private".
- Country
- Postal code, City
- Street - ℹ️ The field contains the street name and house number.
- State
- Address supplement
- Search
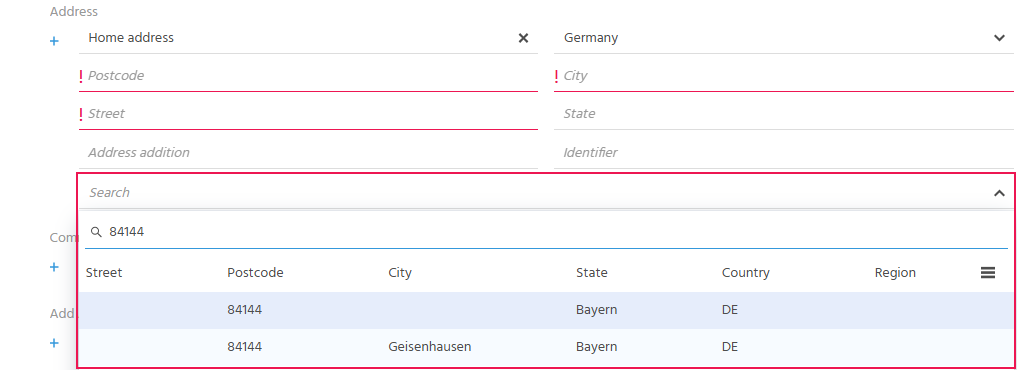
Capturing Using the "Search" Function
To capture as valid addresses as possible, the "Search" supports the process.
- "Postal code" or "company name" can be used as search terms.
- The search result is limited to the country selected in advance.
➡️ When an address is found via the search, the values for longitude and latitude are additionally saved in the background. These are required for the "proximity search" function.
Address Validation
Address validation uses Nominatim and is always performed when an address has been adjusted and saved. It can additionally be executed by Processes.
If it is detected that an address is not valid, it is marked in the Preview with a "!" next to the address type. This means that this company is not displayed in the map View and the proximity search does not work.
Default Address
The first address captured is set as the default. This is indicated by the address type being displayed in bold.
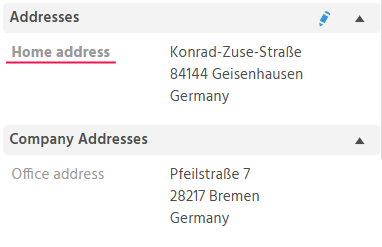
The address marked as the default cannot be deleted.
If multiple addresses have been captured (private or company addresses) and there is an address under which the contact is preferably reachable that is not the first address captured, any address can subsequently be set as the default address (see chapter "Changing Default Addresses or Communication Data").
If no address can be captured (because the information is not available, for example), the address area can be removed. This removes the required field behavior in the "Address" area and the record can be saved without address data.
Capturing Communication Data
Any number of communication data entries can be captured for a contact to ensure reliable and up-to-date reachability via various communication channels.
Possible Communication Channels
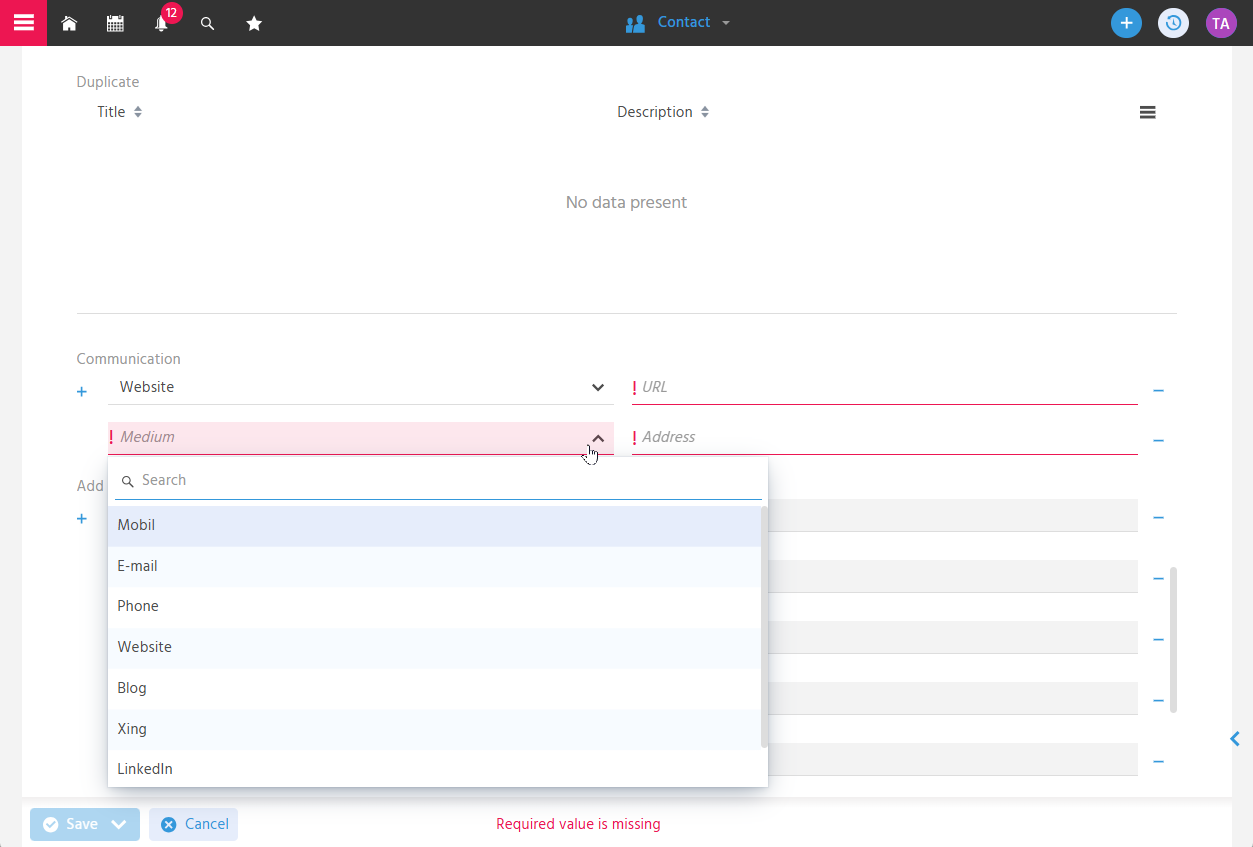
Communication data is captured for the following communication channels:
- ☎️ Phone,
- 📱 Mobile,
- 📧 E-Mail,
- 🌐 Website, Xing, Blog, LinkedIn.
Validation of Communication Data
The validation of communication data checks whether the data is plausible and reformats it into a standardized format (depending on the communication channel).
Validation of a Phone Number
When capturing a phone number (phone or mobile), the country code is automatically set by the system and is based on the country captured in the default address.
-
Case A: Contact is linked to a company & has no private address
→ The company's default address is used -
Case B: Contact is linked to a company & has a private address marked as the default address
→ The contact's default address is used -
Case C: Contact is a private individual & has a private address marked as the default address
→ The contact's default address is used -
Case D: Contact is a private individual & has no private address
→ The country code is validated against the country of the logged-in user -
Case E: No address is captured
→ The country code is determined via the country that the user has selected for ADITO (e.g., via the login screen)
If a valid country code has already been manually entered or subsequently edited, it will not be overwritten by the system.
Handling of the "leading zero"
The leading zero can be omitted when capturing the number.
Example: A Munich phone number is to be captured. The Munich address has already been entered.
Possible inputs:
89123456→ is completed and captured as+49 89 123456089123456→ is completed and captured as+49 89 123456+4989123456→ is captured as+49 89 123456
‼️ For numbers from the USA, this must be omitted, as there are no area codes beginning with 0.
Example: A US phone number is to be captured.
Possible inputs:
212 1234567→ is completed and captured as+1 212-123-4567+12121234567→ is captured as+1 212-123-4567
Validation of an E-Mail Address
The validation of an E-Mail address checks for the '@' and a valid ending (.de, .com, etc.).
Validation of a URL
When capturing a URL, a valid URL format is checked and "https://" is automatically added.
Default Communication Data
The communication data captured first is set as the default. This is indicated by the name of the communication channel being displayed in bold. If there are multiple phone numbers/mobile numbers or E-Mail addresses under which a contact can be reached, one of these can subsequently be defined as the default (see chapter "Changing Default Addresses or Communication Data").
Capturing Preferred Language
The "preferred language" of the contact is captured so that communication takes place in the language appropriate and desired for the contact. "German" is entered by default.
A contact informs you that they prefer to communicate in English, as this is, for example, the company language rather than the respective national language.
➡️ This means that letters or E-Mails are created in the language specified here.
The contact's Salutation is displayed in the contact's preferred language in the system, not in the client language used by the user.
Details
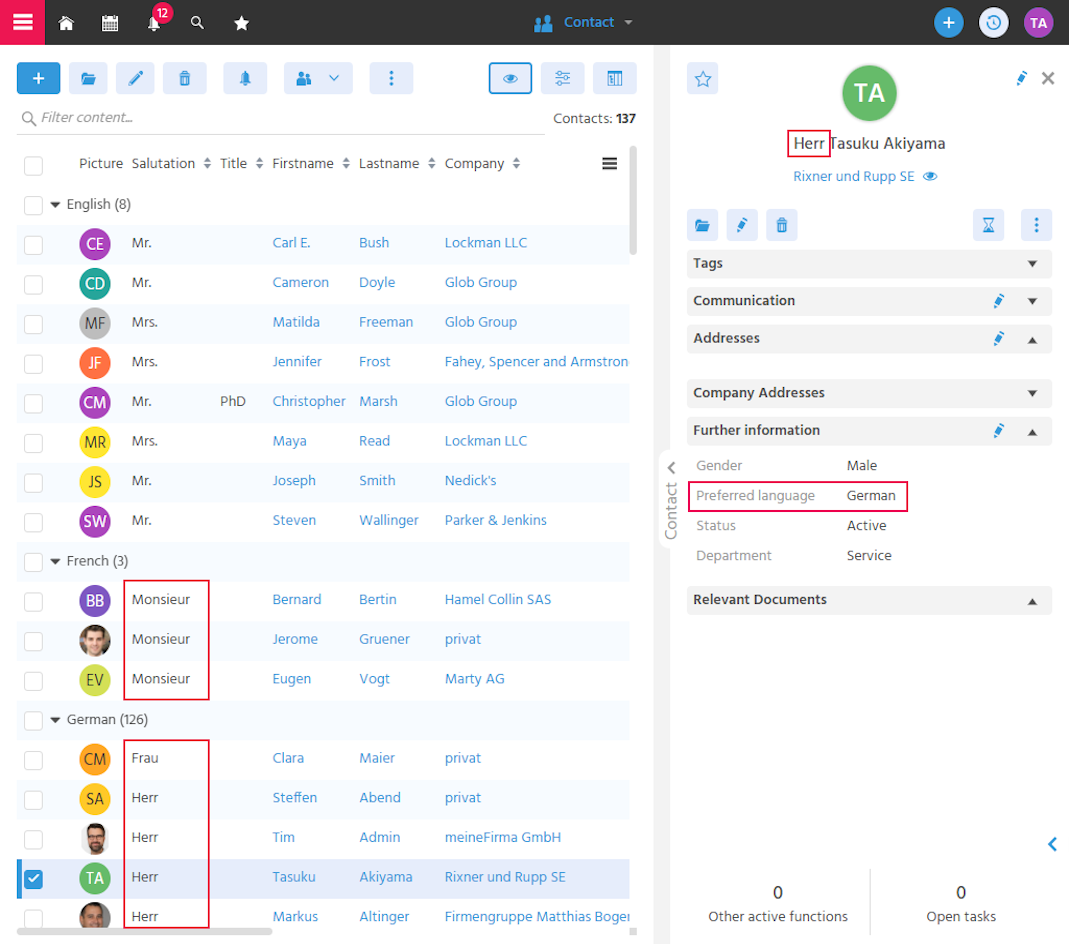
🛠️→ The default "German" can be adjusted via customizing.
Documenting Status
The status of a contact is documented to ensure that the contact is approved for further business relationships/communication. A contact can go through the following status values:
-
🟡 The status "pending review" is used when the contact must undergo a review before they may be actively used in the system.
-
🟢 The status "active" is the status that approves collaboration with the contact.
-
🔴 The status "inactive" is set as soon as interaction with the contact is no longer permitted. This deactivates the communication functions, etc., making it no longer possible to interact with the contact.
-
🔴 The status "marked for deletion" is the status set by the system as soon as a deletion flag has been set on the contact. This means that, for data protection reasons, no further interaction with the contact may take place.
Adding Attributes
To capture additional information, the so-called "Attributes" in ADITO are suitable for this. This allows a contact to be described in as much detail as possible. Attributes are captured on the record so that they can be filtered on. The filter result can then be submitted to further follow-up Activities using serial actions.
If Attributes must be captured when creating a new contact, the Attributes have been defined as required fields to ensure this information is captured.
If no Attributes can be selected, no Attributes have been stored in the system that can be captured for the contact.
Attributes can be created and adjusted by the System Manager.
📖 → Further Information
Avoiding the Creation of Duplicates
During the capture of a contact, all potential duplicates are automatically listed to avoid redundant records and ensure that existing contacts are correctly continued rather than created twice.
Regardless of which EditView is used to create the contact, possible duplicates are displayed at the very top.
This area cannot be scrolled, so that this important information is always kept in view.
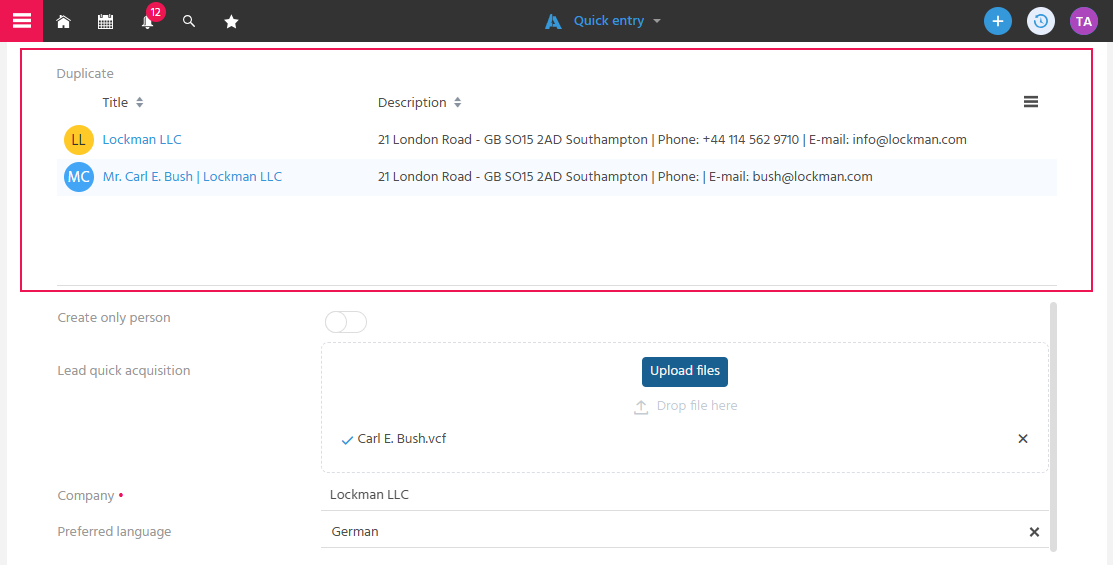
The duplicate check only takes place when at least one value — such as First Name, Last Name, or E-Mail address — is filled in. Prior to this, no duplicates are suggested in the "Duplicate" field. It is checked here whether the names are identical. In the case of the E-Mail address, not only whether the address is the same is considered, but also whether it is not provided.
To include additional information such as Date of Birth as a check criterion, this can be added administratively.
The listed possible duplicates can be opened for further processing.
🏷️ → For information on resolving duplicates, administering duplicate scan patterns, etc., see the tag "Duplicates"
Capturing Additional Professions
If an additional profession is to be documented in the system for a person already captured as a contact, these can be captured as an additional function on the existing record. This avoids redundant records and consolidates them under one record.
This creates an overview of all professions of this contact in the "Other Functions" tab in the MainView of the contact. Additional professions can be captured here. The Preview also shows how many active "other functions" a contact has.
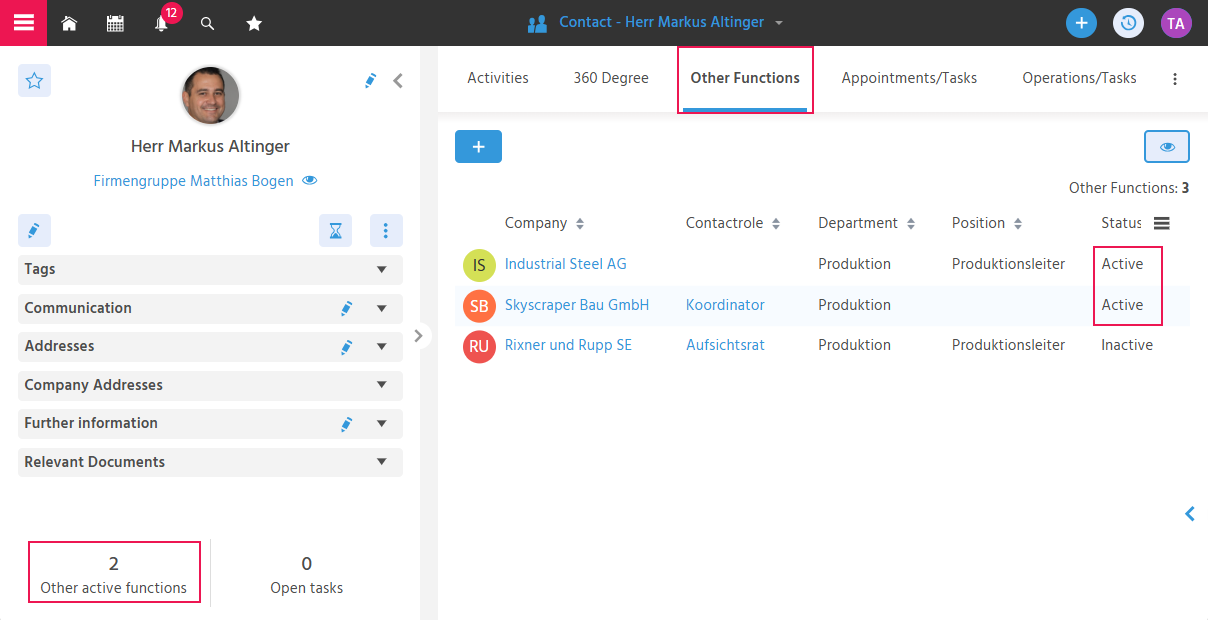
The records of the various professions are found in the index search and listed in the FilterView.
Case Example 1: A Contact Works at Multiple Companies Simultaneously
"A contact informs you that they are now also working at another company.
For example, Monday to Wednesday they work at Company A and Thursday at Company B."
This is how the contact is correctly captured in the system:
-
Employment at Company A
This is the record that was already initially captured in the system. -
Employment at Company B
-
Open the contact record linked to Company A. Open the "Other Functions" tab in the MainView.
Create the contact record working at Company B there using the create button. -
The selected person is already pre-filled and cannot be edited. In the next step, select the company at which the contact will additionally work in the "Company" field.
-
If necessary, add communication data and department/function/position of the contact for this company.
-
Attributes: If Attributes are already captured in the original contact record, they are displayed here. If they are not known to differ in the new function, they can be removed using the minus button.
➡️ 2 active contact records are displayed in the "Contact" FilterView.
➡️ Both contact records are found in the index search.
Case Example 2: A Contact Changes Company
There is a contact in the CRM who is leaving the company they have worked for up to now and is moving to another company, which is also managed in the CRM.
This is how the contact is correctly captured in the system:
- Proceed as described in Case Example 1 to add the contact at the "new" company.
- Open the Preview of the contact at the "old company".
- Edit the "Further Information" area and set the status to "inactive" there.
➡️ 1 active contact record exists.
➡️ In the "old" company, the contact is no longer displayed in the "Contacts" tab, as inactive contacts are hidden by the predefined filter "Status not equal to inactive". If the filter is removed, the inactive contacts are displayed with an X in the image.
➡️ The inactive contact record does not appear in the index search.
The company affiliation cannot simply be changed in the contact by changing the company name, as the contact is linked to offers, Activities, etc. via the link to the company.
Therefore, the "Company" field in the contact is not editable afterwards.
A company change can only be mapped as shown here.
Case Example 3: A Contact Leaves the Company
There is a contact in the CRM who is leaving the company they have worked for up to now (retirement, death, or they change companies, but it is not known to which new company).
This is how the contact is correctly captured in the system:
- Open the Preview of the contact record.
- Edit the "Further Information" area and set the status to "inactive" there.
➡️ In the "old" company, the contact is no longer displayed in the "Contacts" tab, as inactive contacts are hidden by the predefined filter "Status not equal to inactive". If the filter is removed, the inactive contacts are displayed with an X in the image.
➡️ The inactive contact record no longer appears in the index search.
Case Example 4: A Contact's Additional Function Is to Be Deleted
The "Delete this function" Action can be executed via Further Actions in the Contact Preview.
-
Case A: A contact has no links to further records (e.g., Activity, Opportunity, ...)
➡️ Result: Contact is deleted -
Case B: A contact has links to further records
➡️ Result: The contact's status is set to inactive.
Changing Default Addresses or Communication Data
If multiple addresses or communication data for E-Mail or phone/mobile number are captured, one of each can be defined as the default. These default entries are used by Actions for correspondence to reach the contact/company preferably via this address.
A contact informs you that in the future they are primarily reachable on their mobile number and rarely on their phone number, as was previously the case.
Initial situation: The phone number is shown in bold as the default.
Using the "Adjust Defaults" function (in the Other Functions of the Contact/Company Preview), a View opens in which an address, an E-Mail address, or a phone number can be selected for each.
ℹ️ Mobile numbers are also listed in the phone number selection.
➡️ After saving, the selected mobile number is now shown in bold.